
How to use one framing hint at a time in Take PRO
A camera hint is useful only when you can connect it to something you see. If you turn the phone, change the zoom and move closer at once, it becomes difficult to tell which action changed the picture. This guide suggests a slower way to work with Take PRO: read one instruction, make one small adjustment, then look again. The aim is to understand the choice you are making, not to collect as many corrections as possible.
Give the instruction a clear subject
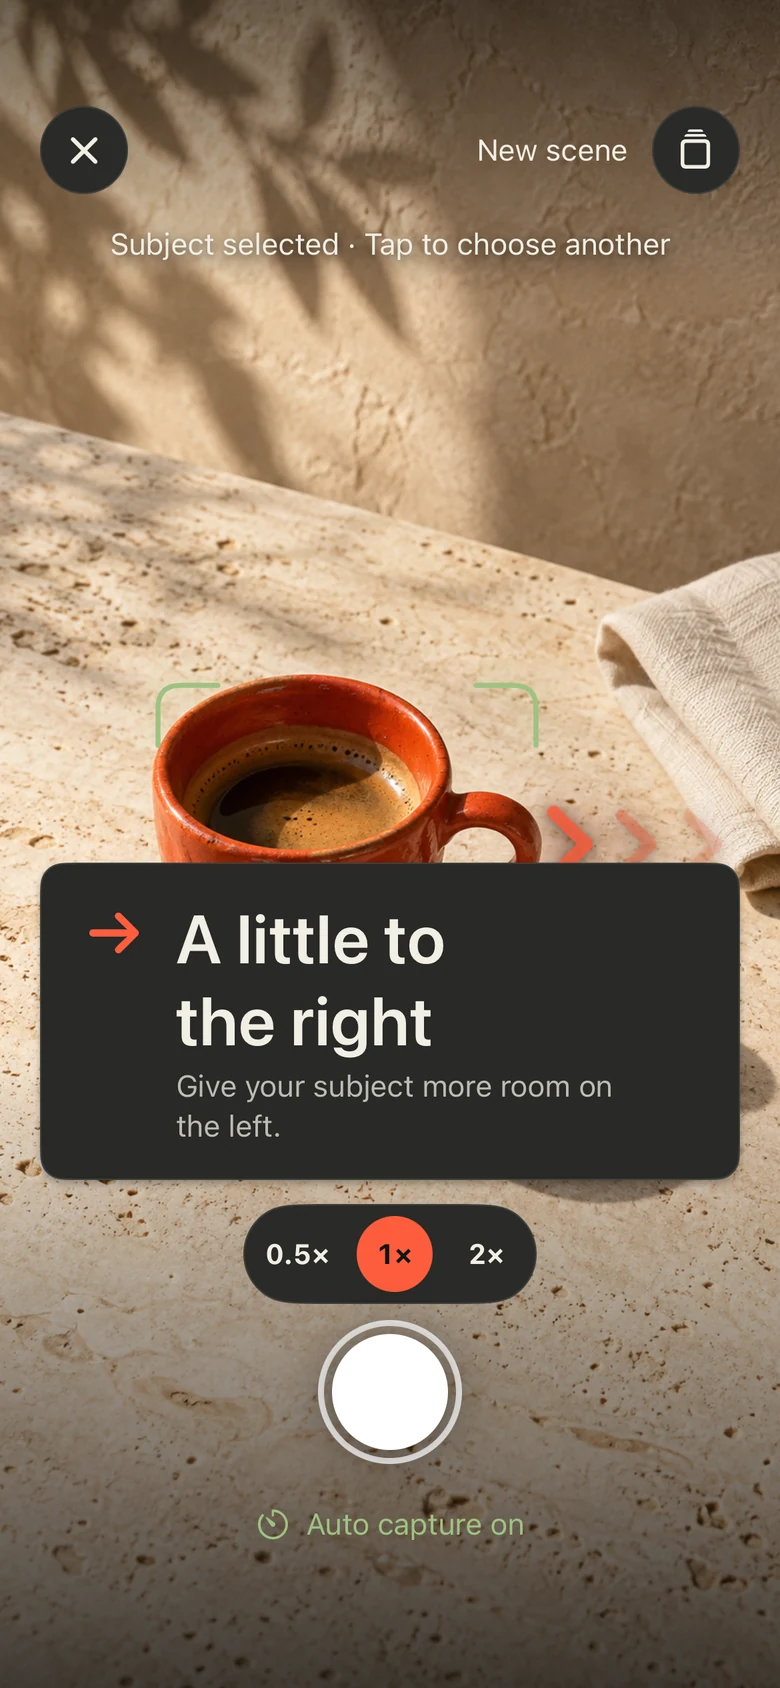
Start with a scene that can wait: a cup on a table, a plant or another everyday object. Choose what you want the photograph to be about before you begin moving. In the public Take demo, the first step is selecting a subject by tapping it. The guidance screen then shows that a subject has been selected.
For this practice, keep that choice stable. If your attention shifts from a cup to the window behind it, pause and decide which picture you now want. A different subject changes the purpose of the exercise. You do not need to finish a sequence of adjustments when your original idea no longer matters.
Read the reason as well as the direction
The example screen says “A little to the right” and explains “Give your subject more room on the left.” Read both lines before acting. The short line gives a direction; the longer line describes a framing relationship to inspect. Look at the gap beside the subject so that the instruction has a visible reference.
Do not treat a directional word as a measurement. The demo does not specify a number of centimetres or degrees. Nor does a still screenshot establish a universal relationship between your hand movement and the subject’s position on screen. Use the live picture to see what your adjustment actually changes.
Choose one adjustment you can follow
For a first attempt, keep the same zoom and stay in the same place while making a small, controlled change to where the phone points. Watch the subject and the nearby edge together. Stop the movement when you can notice the difference; there is no need to make a large sweep to demonstrate that you followed the hint.
If the result moves away from your intention, return towards the earlier framing and try a smaller adjustment. Changing zoom or distance at the same time would introduce another variable. Save those decisions for a separate attempt so you can describe what caused the change. This is an editorial practice method, not a description of Take’s internal algorithm.
Check the whole picture after the move
Look away from the hint panel for a moment and examine the picture. Is the important part of the subject still visible? Did an edge cut into something you wanted to keep? Has a previously quiet area filled with a distracting object? An adjustment can solve one relationship while changing another.
With a cup, for example, the handle may matter more to your idea than an even gap on either side. Name that priority before continuing. If you cannot say why the new arrangement suits your photograph, pause instead of adding another correction immediately.
Know when to stop adjusting
You can stop when the subject and its surroundings express the small idea you began with. That might be the curve of a handle or the relationship between an object and its shadow. A hint is a prompt for attention; your preference remains part of the photograph.
The public website describes an automatic capture countdown when the frame is ready and says auto capture is enabled by default. Notice the capture state shown in the app rather than assuming the camera is waiting indefinitely. This guide does not prescribe timing or promise that every scene will produce the same instruction.
Keep one observation for the next attempt
After taking a photograph, write or remember one concrete observation: changing the phone direction opened the left edge, but brought a cloth into the right edge. That sentence is more useful for practice than simply calling the result better. Next time, begin by noticing the relationship you learned to recognise.
Take PRO is an iPhone app with an English interface. Its public materials describe live guidance; current availability and subscription details are in the App Store. The exercise here uses a real demonstration screen, but it does not measure the app’s effectiveness or imply that all features are included in a free plan.