
BETTER PHOTOS / PRINCIPLE 11
One subject.
Two ways to see it.
A reflection gives an ordinary scene a second layer. A doorway can appear upside down in a puddle; a quiet pond can repeat the outline of a building. The useful decision is not simply to include shiny water, but to decide what the reflected image contributes.
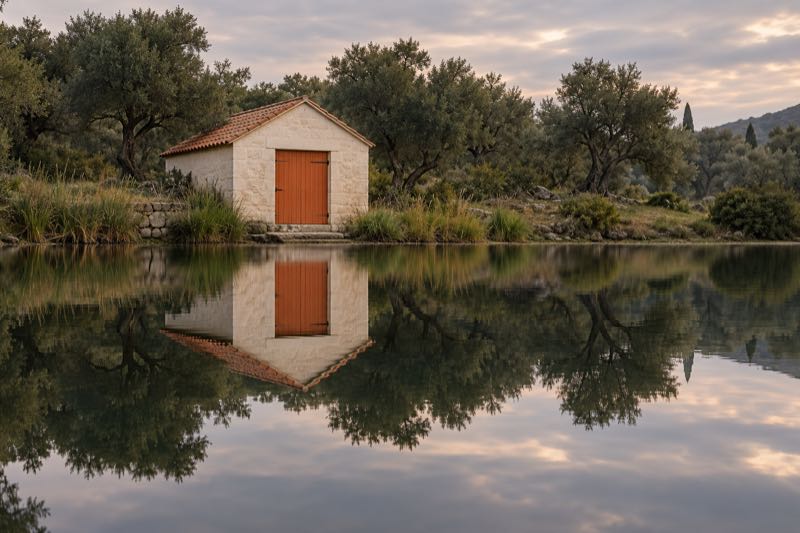
Move until the reflection is readable, then decide how much of the real scene belongs beside it.
Start with a relationship, not a surface
Ask what links the two parts of your picture. Is the reflection repeating a distinctive shape, adding a second colour, or transforming something familiar? A large patch of water without a readable subject may add little to the photograph you intend.
For a simple first attempt, choose one recognisable object: a door, a tree or a small building. Look for the same identifying feature in the reflected image. If the orange door is your subject, check that its reflected shape is visible instead of hidden among unrelated bright patches.
Find the angle before using zoom
The reflection changes as you move. Adobe recommends exploring different positions and heights; Nikon notes that calm water gives clearer reflections. Those are starting conditions, not a requirement that every picture look like a perfect mirror.
At a puddle, stand where the whole reflected doorway is visible. Lower the phone gradually and watch the screen rather than assuming that the lowest position is best. Try a small sideways move too. Stop where the outline reads clearly; zooming from the original position cannot reveal a reflection that was outside that viewing angle.
Choose one of three compositions
First try the real object and its reflection together. A central waterline can make their relationship easy to read. Next give more room to the reflection, leaving only enough of the actual scene to explain it. Finally photograph the reflection alone, using a leaf or the puddle edge as a clue.
These are three different intentions, not a ranking. For our illustrated boathouse, the paired view explains the inverted roof immediately. A tighter view of the orange doorway in water would make colour and distortion the subject instead. Compare both before deciding.
Check light and sharpness in the saved photo
A bright sky and a darker reflected scene may be difficult to record together. If your camera offers a brightness control, make a small adjustment and inspect the result. Do not brighten the water so much that important detail in the building disappears. A different angle or softer light may be the more useful change.
Keep the phone steady, take a picture and enlarge the part that matters. A sharp leaf on the surface does not prove that the reflected building is sharp. If your camera allows you to select focus, choose the intended subject and check again. Judge the actual image, not only the small live preview.
Water and glass need different decisions
In a puddle, inspect the boundary: does it cut the reflected roof accidentally, or frame it deliberately? With a window, you may see both a reflection and objects behind the glass. Choose which layer should lead and reposition until the other becomes quieter.
You may also discover your own outline in the window. Include it as part of the idea or move until it no longer distracts. For a café-window exercise, use the reflected façade as the main shape and let the interior become a secondary layer. Avoid filling every empty area with another object.
Common mistakes and useful exceptions
Do not straighten the real scene while ignoring a tilted waterline, crop off the reflected feature you meant to show, or assume more saturation will clarify an untidy overlap. Make one framing change at a time and compare it with the previous picture.
Ripples, broken reflections and asymmetry can be the point. Keep them when you want movement or abstraction. A reflection-only photograph need not explain its location immediately. The test is whether the ambiguity feels intentional to you, not whether the two halves match exactly.
Five-minute exercise: three versions
Choose one accessible puddle or window and one subject. Without changing location radically, make a paired composition, a reflection-dominant composition and a reflection-only detail. In each, identify the same key feature and check the borders.
Compare the three saved images. Write one sentence about what each version makes you notice first. Keep the one that expresses your intention and repeat the exercise on a different surface. You can bring this framing practice into your next Take PRO session on iPhone. The app interface is English; current availability and terms are in the App Store.